Prism Pillow Crochet Pattern
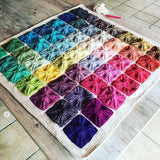
You know when you are finished with a project and are left with the few bits of leftover yarn--and those leftovers are enough to make something terrific, but you need some inspiration? Well, I'm hopping in to help you with that problem. And if you were fortunate enough to participate in my latest Prism Blanket MAL, you'll have just the yarns you need to make today's new free crochet pattern I'm calling the Prism Pillow. Wanna see?

You might know that I'm a huge fan of linen stitch (moss stitch) for lots of reasons, but mostly because it makes such a lovely fabric on both sides. These squares are also worked in a corner-to-corner fashion so creating the half-squares is super easy. I then used linen stitch in regular rows for the striped back of the pillow--adding some buttons so you can remove the cover for washing.

I really like these buttons with the random colors that remind me of acrylic paint pouring, too. But you can use any five 1" (2.5cm) buttons of your choice. You'll also need a 4mm hook.
Remember, the yarns used here were leftovers from the ones used for the Prism Blanket. There should be plenty to make the cushion cover, but it's also a great stash-buster. You'll also need a 16" (40.5cm) square pillow form*.
I used Scheepjes Colour Crafter* (100% Premium Acrylic; 3.5oz/100g;328yds/300m; 1 ball of each color using only small amounts of colors A-H) in the following colors...
- Tilburg (#1083 - A)
- Leek (#1132 - B) or Vlissingen (#1723 - B)
- Leerdam (#1263 - C)
- Groningen (#1259 - D)
- Eelde (#1422 - E)
- Zwolle (#1082 - F)
- Hengelo (#1084 - G)
- Den Bosch (#1241 - H)
- Heerenveen (#1203 - MC)
You might notice that the stripes on the pillow back shown in the picture above uses more than the number of colors listed. I added the few other colors for that part from the Prism Blanket leftovers, but you can add as many color stripes as you want or even add an additional stripe repeat on the back.
To meet gauge so your pillow insert will fit...
- Square motif = 4” (10cm)
- Pillow cover = 15.5 “(39cm); this includes the pillow back. I had a few testers who struggled to meet gauge on the pillow back. I suggest going up a hook size and really being aware of the tension of your chains--think loose! The front will be slightly larger than the back, but this also works to pull the front around the pillow edge for a nice finish.
Some notes to consider:
- Pillow front is made of 16 motifs worked in rows and then joined with a hook in 4 x 4 grid. The pillow back is also worked in rows turning at the end of each row. The pillow back and front are then joined to each other before adding buttons for closure.
- Refer to picture for color placement when making squares and positioning them for the pillow front.
- If gauge is met, the sample pillow cover requires approximately 10g of Leek (or Vlissingen), Groningen, Zwolle and Hengelo, 15g of Tilburg, Leerdam, Eelde and Den Bosch, and 60g of Heerenveen—160g/480m total.
- There is no right side to the Pillow Front Squares until they are joined together. The joins are worked on the wrong side.
- Ch 1 at the beginning of a row does not count as a st.
- When instructed to change colors, do so on the final yo of the last stitch of the row drawing through the new color, fastening off the old color.
This pattern is written in standard US crochet terms:
- ch = chain
- hdc = half double crochet
- MC = Main Color
- rep = repeat
- RS = Right Side
- sc = single crochet
- sk = skip
- sl st = slip stitch
- sp(s) = space(s)
- st(s) = stitch(es)
- WS = Wrong Side
- yo = yarn over
The only special stitch used in the pattern is:
- join with sc: with slip knot on hook, insert hook in designated st or sp, yo and draw up a loop, yo and draw through both loops on hook
PIllow Front Squares:
See Color Placement Diagram for colors used for each square. It does not matter which of the two colors of each square is used as the first color.
Row 1: With first color, ch 4, sc in first ch, turn [1 sc]
Row 2: Ch 3, (sc, ch 1, sc) in ch-3 sp, turn [2 sc]
Row 3: Ch 3, (sc, ch 1) in next ch-1 sp, (sc, ch 1, sc) in last ch-3 sp, turn [3 sc]
Row 4: Ch 3, *(sc, ch 1) in next ch-1 sp; rep from * across, (sc, ch 1, sc) in last ch-3 sp, turn [4 sc]
Rows 5-14: Rep Row 4 [14 sc]
Row 15: Ch 2, *(sc, ch 1) in next ch-1 sp; rep from * across, (sc, hdc) in last ch-3 sp, change to new color, fasten off first color [14 sc, 1 hdc]
Row 16: With new color, ch 2, *(sc, ch 1) in next ch- sp; rep from * across, omitting last ch 1, sc in ch-2 sp, turn [14 sc]
Row 17: ch 2, *(sc, ch 1) in next ch-1 sp; rep from * across, omitting last ch 1, sc in last ch-2 sp, turn [13 sc]
Rows 18-27: Rep Row 17 [3 sc]
Row 28: Ch 2, sc in next ch-1 sp, sc in last ch-2 sp, turn [2 sc]
Row 29: Ch 2, sc in ch-2 sp, fasten off [1 sc]
Weave in ends and block as desired.
Pillow Back:
Top Placket
With MC, ch 70
Row 1: Sc in second ch from hook and each ch across, turn [69 sts]
Row 2: Ch 1, sc in first sc, ch 1, sk 1 sc, (sc in next sc, ch 1, sk 1) rep across, turn [35 sc, 34 ch-1 sp]
Row 3: Ch 1, (sc in next ch-1 sp, sk 1 sc, ch 1) rep across, sc in last sc, turn
Rows 4-6: Rep Row 3 changing to A at end of Row 6, do NOT fasten off, drop MC
Rows 7-8: With new color in sequence, rep Row 3, fasten off, pick up MC
Row 9: With MC, rep Row 3, change to next color in sequence
Rep Rows 7-9 with each color in sequence
Continue with MC in pattern until piece measures 10”/25.5cm. Do not fasten off. Continue to Buttonhole Rows of Top Placket.
Buttonhole Rows of Top Placket:
Row 1: Ch 1, *(sc in next ch-1 sp, sk 1 sc, ch 1) 4 times, sc in next ch-1 sp, ch 3, sk 2 sc; rep from * 4 more times, (sc in next ch-1 sp, sk 1 sc, ch 1) 4 times, sc in last sc, turn [30 sc, 5 ch-3 sps, 24 ch-1 sps]
Row 2: Ch 1, *(sc in next ch-1 sp, ch 1, sk 1 sc) 4 times, (sc, ch 1) twice in ch-3 sp; rep from * 4 more times, (sc in next ch-1 sp ch 1, sk 1 sc) 4 times, sc in last sc, turn [5 buttonholes]
Final Row (WS): *(sl st, hdc) in next ch-1 sp, sl st in next sc; rep from * across, fasten off
Bottom Placket
Rep Rows 1-2 as for Top Placket, rep Row 2 until piece measures 10” (25cm). Note: There is no RS/WS with this piece.
Weave in ends and block, as desired.
Now let's see if we can put it all together. This Color Placement Diagram should help you position your squares. Remember, there is no front or back to each square until the 16 squares of the front panel gets all joined together.

Joining Pillow Front Squares:
The joining will be done on the wrong side of the pillow front, but the squares do not have a RS or WS. With squares positioned as shown in the Color Placement Diagram above, with main color, join with sc in ch-sps of two squares to be joined at edges of squares. Ch 1, *(sc in next ch-sp, ch 1) rep to corners, ch 1 across gap to next squares; rep from * across pillow cover. Rep joining all squares in the same direction before joining squares in opposite direction. Let me show you more...

Joining with a sc starts with a slip knot on your hook, then insert your hook through both thicknesses of the squares to be joined through the corner ch-sps.

Then ch -1 and sc in the next ch-sps, continuing across to the corners.

This shows the ridge made by the (sc, ch 1) in the ch-sps across the square.

The image above shows what the RS of the pillow front will look like.

When you get to the intersection between squares, make certain to ch 1 across the gap.

This shows a closer view of the positioning of stitches when joining.

Once you get to the intersection between squares, make certain to ch 1 across the gap. This gives the joins a bit more "wiggle room" and keeps things square.
Joining Pillow Front and Back:
Holding wrong side of pillow front and pillow back together with buttonhole placket of back panel on top, loosely sl st or whipstitch through both front and back panels evenly around being careful to work through all three thicknesses where the top and bottom plackets of the pillow back overlap. Fasten off and weave in ends. Attach buttons in alignment with buttonholes and insert pillow form.
Ta-Dah!!

I hope you enjoy the pattern. I think it makes a great "partner" for the Prism Blanket. You can find the ad-free, tidy PDF pattern for the Prism Pillow in my shop here. And if you want the companion Prism Blanket pattern you can also find it in my shop. I hope you enjoy this colorful crochet journey. It's certainly been fun for me!
If you are wondering where the best places to purchase Scheepjes yarn is, these folks all have it with international shipping.
Deramores*
Wool Warehouse*
Knotty House*
Black Sheep Wools*
Local Scheepjes Retailers
Happy Hooking, my friends!
Be well, wear your seatbelt, eat your vegetables, be forgiving and SMILE! (Hey, I'm a mom so this kind of advice comes easily.)
* This post contains affiliate links which if used by you cost you no more but may provide me a small commission that helps me continue providing free patterns. Thanks for your support!


